
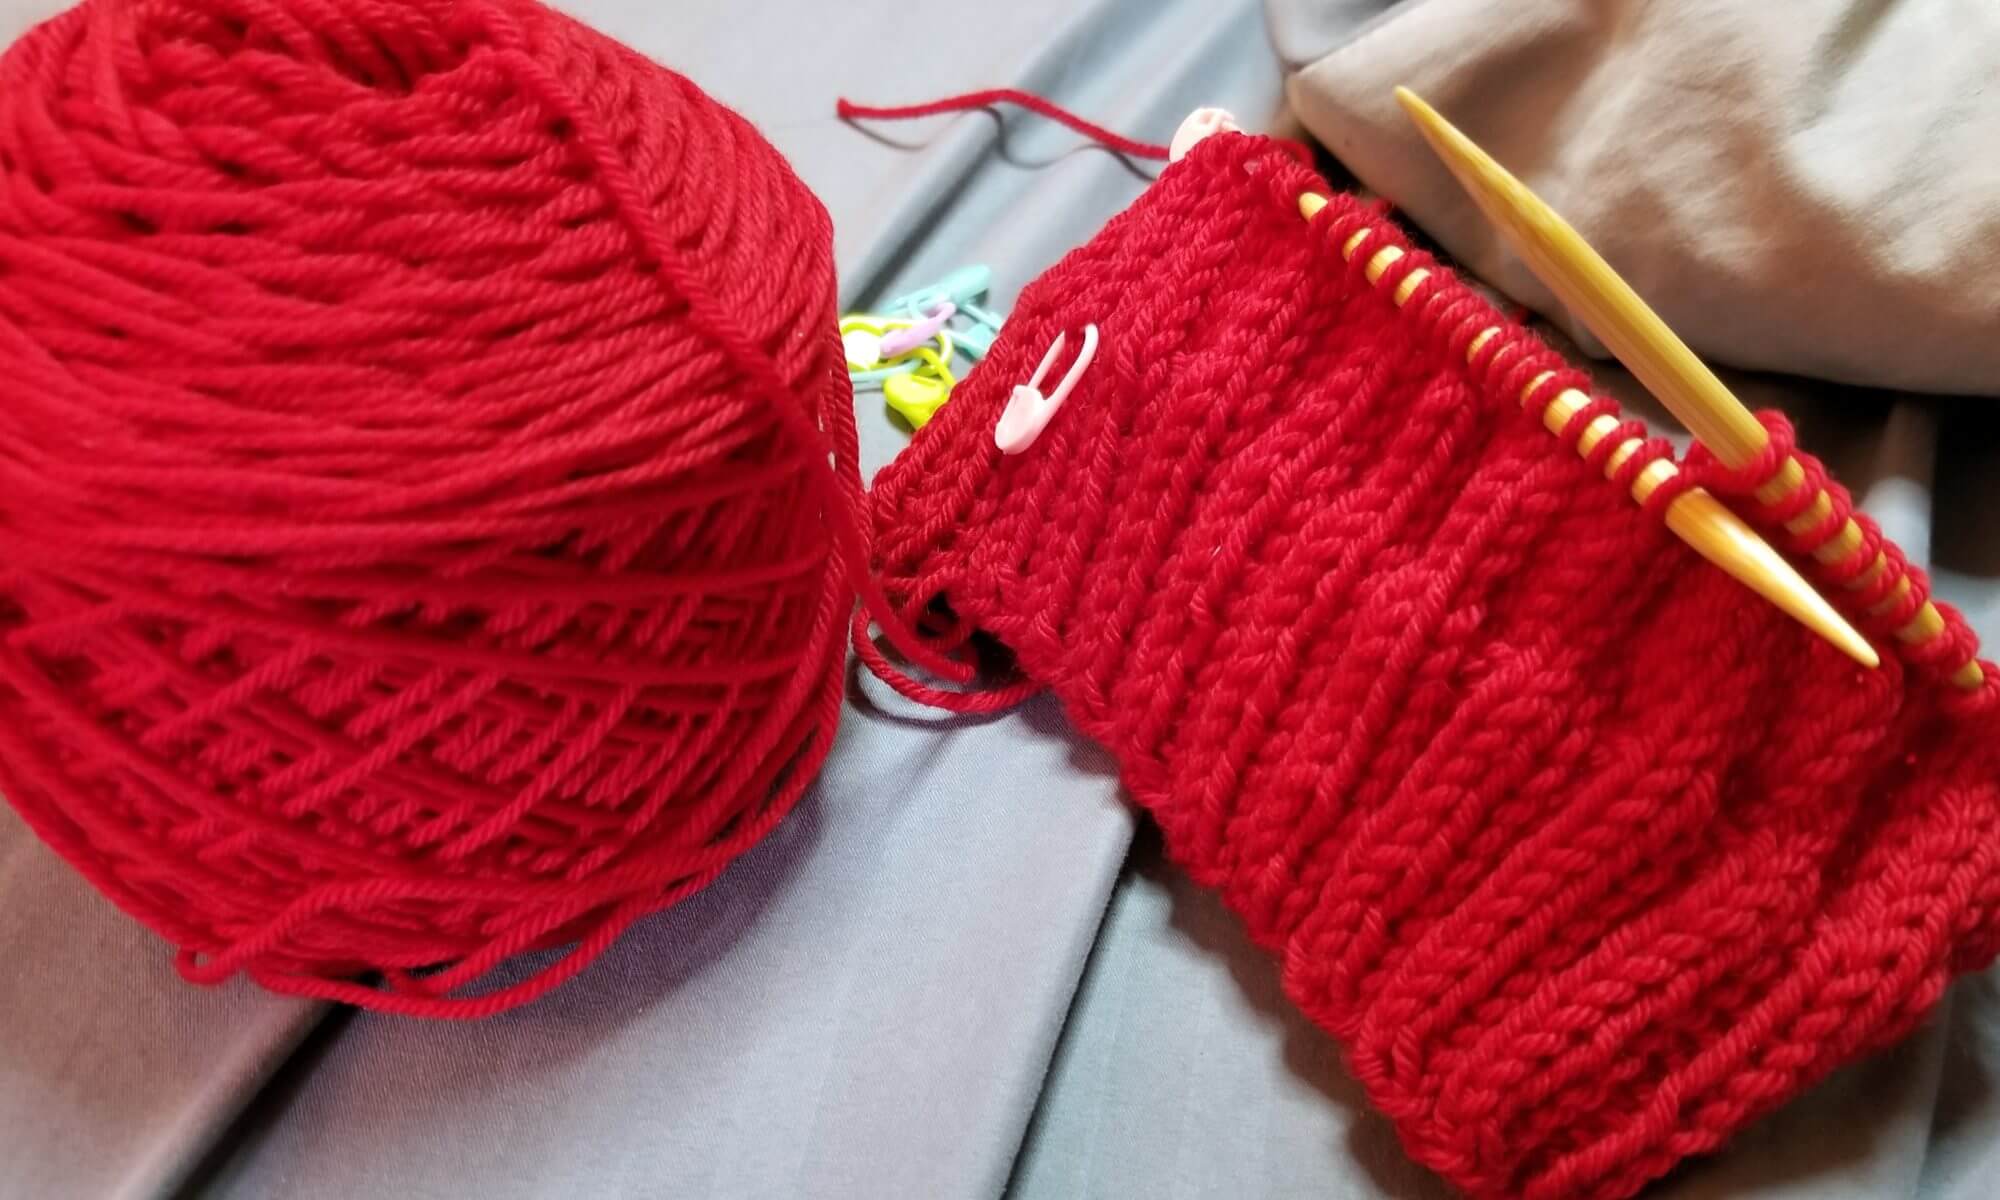
Just a quick update on the first project on the 3D-printed loom. The loom is built, now it’s time to make something!
I make stuff.

Just a quick update on the first project on the 3D-printed loom. The loom is built, now it’s time to make something!


A while back, I found 3D printing files for a rigid heddle loom. A new loom had been on my wish list for years but I never pulled the trigger. Honestly, I think I’ve become frugal in my old age. Years ago I wouldn’t have thought twice about adding a new loom to my cart and checking out, but these days I just can’t justify in my mind paying hundreds of dollars for a couple pieces of wood and some plastic. Especially when I’ve had 3d printers in my home for 10 or 15 years now and I pretty much DIY everything I can.


I did it, I finally got around to getting the loom fixed up and I tried weaving. About 3 years ago, I found this antique loom on craigslist at a local artist’s estate sale and I went and nabbed it. I initially cleaned it up and got it in working order before life hit and house projects took over. This loom ended up being stashed away in storage for a while and pretty much forgotten.
I’ve wanted to play with a loom and try different types of weaving as long as I can remember. I shop online for them all the time but I just never pulled the trigger on actually buying one. The problem is that I look at what companies are selling and I just can’t seem to justify the price in my mind. If you look at most small looms (tabletop or lap) it really takes the most basic of woodworking skills to make one. I don’t understand how they charge hundreds to many thousands of dollars for a few pieces of wood and screws. As a beginner, I don’t really want to make one, I want to know how a professional one works first.

So the last time I was at the fabric store I saw a mini weaving loom loom on the shelf. Basically a picture frame with sawed out grooves for yarn. For a few dollars I figured I could play with this and see how interested I really am in it and maybe use up some of that scrap yarn from all the socks I’ve made.

While this is great for tapestry work, not so much for weaving. I didn’t realize you’d end up sewing your way through it since there is no heddle or shuttle and then using a rake/fork to push all your work down since there is no beater. After playing for a bit and I decided I hated it. I may make some hangings at some point with it, but my main goal is to use my piles of scrap yarn to make some scrappy scarfs.
I took to scouring craigslist for local looms. Most looms you find are large floor models, which I definitely don’t have space for nor do I want to move one. Eventually I saw an ad for a 1927 model from an artist’s estate listing. I emailed and that weekend ran over and got it.

I dragged it to the back deck and ignored the fact that I had not completed the mowing. See that gas can in the picture? Yeah, that’s supposed to remind me to do yard work and not waste my day on my arts and crafts. Adulting is horrible like that.
There was no way this thing was going in the house until it was sparkling clean. I have a severe allergy to dust and cleaning this was going to be a struggle. It had been sitting in storage since the mid-70’s. I could tell because there was brittle newspaper jammed between the layers of warp thread on the back roller.
Hours later, all the dust and grime was gone and it resembled a wood loom again.
Now I need to figure out where to put this thing since I haven’t found my second hoarder house yet. More to come once I find a place to set it up.

Yesterday, while browsing the store during lunch, I stumbled upon the LoopdeLoom. I usually avoid gimmicky things or things not marketing towards my general craft experience level, but this one called to me. I don’t know if it was my desire to finally have a loom of some type or the 40% off the clearance price sticker that did it, but I got one. It’s marketed at young girls, so, to be honest, I wasn’t expecting much.
The instructions were very simple. Stick the pegs in, cut your yarn for the length of the project (2 x length + 12″).

My first impression of it was that it was very plastic, but it all seems to move smoothly. I really like the idea that if I like this I can chain several of these together for larger projects. Starting off seemed rough. At first, it didn’t seem like I picked the right yarn, it was very bare and sparse looking. But once I got a few rows in everything started pulling together.

After a short while of watching T.V. and putting yarn on the loom, I filled it up and was ready to progress into the next section. This just meant pulling the sticks out and then putting them back into the base without any woven material on them.

After about an hour and a half of mindlessly adding thread onto the loom and watching late night shows, I realized I had progressed pretty far. After a few minutes with this thing, you really master it and clip along at a good pace.

The only issue I had through this project so far was the pegs kept smacking each other whenever I moved onto the next row and I moved the giant switch. As you can see in the last picture, two of the pegs are stuck together. Now, it’s not an issue really, you just give them a nudge and they go back to where they’re supposed to be. But row after row of this happening really made it annoying, especially when you have a good pace going. But this may be why they include a few extra pegs in the box. Eventually, they’ll likely get all bent out of shape…. it just seemed really soon for it to already start happening.
I really wish the pegs (at least the shafts) were metal. Other than that I was having fun with this thing. Another night or two and I should have myself a nice soft scarf for the upcoming winter.
